
Anyone using Quickbooks knows how important it is for your business. More than that, backing up your financial data is important. But how many users actually do that? If anything happens to your data then you can retrieve it by only one i.e. using Quickbooks adr file.
Sometimes, the software gets infected with viruses, infections, security threats, and other damage. All these things affect your data. When your data gets damaged or lost, your hard work goes in vain. To get your data back, Intuit designed a feature named QuickBooks Auto Data Recovery, which helps users create a file backup automatically.
It includes numerous features and offers recovery options for users to retrieve their data. The best part is, it is 100 percent safe and accurate, making the original data secure during the process of recovery. This makes your data stay the same as it was before the retrieval process.
Let’s learn more about the QuickBooks Auto Data Recovery file (Quickbooks ADR file), how to get this feature, how it works, and the way to use it.
Quickbooks ADR file: Briefly Explained
The QuickBooks financial accounting software has this in-built feature named Quickbooks auto data recovery which assists users in retrieving QB damaged or lost data. In the beginning, Intuit developed it for the Pro and Premier versions only. However, after some time, the company released it for Enterprise in 2012.
Sometimes, users’ data gets lost and damaged because of many reasons affecting business operations. QuickBooks Auto Data Recovery relieves the user’s tension as it makes the file data more secure and protected.
Here is How Auto Data Recovery Quickbooks Actually Works?

Quickbooks 2012 auto data recovery basically works on Sybase technology. When users encounter any QB error, two ways are used to fix it.
If you are making use of QuickBooks Auto Data Recovery to restore your lost data, consider a few points.
- QuickBooks ADR file is easily compatible with QB Pro, Enterprise Solutions, and Premier. If you have an Accountant QBs Version, you are not going to find it.
- There is a demerit of Qbs ADR file that you will not be able to back up the QB data if the size is exceeding the prescribed limit i.e. 1.5 GB.
- All users have to update the software to its current release to make proper use of QuickBooks Auto Data Recovery.
Way to Utilize The Tool- QuickBooks Auto Data Recovery
As we explained earlier, all lost data can be retrieved using the QuickBooks Auto Data Recovery Tool. Now let’s come to a way through which it can be done.
Method 1: Restoring the Lost Data via Original.TLG File Along with ‘.QBW. Adr File’
The present version of ADR and the original Transaction Log help users to get the newest lost transactions. The instructions are:
- Firstly, make the latest folder anywhere and name it “QBTest”.
- Thereafter, you need to open that specific folder having the company file. There you will find the company file location on the window named “Product Information Screen” and in the screen “No Company Open”.
- Inside the company file folder, search for the .tlg file. Remember that the name of yours.TLG file is similar to the company file name.
- On the off chance, if you are still confused and could not spot the .tlg file, then obey the following instructions:
- Press “Windows+E”. It will open “File Explorer”.
- Choose “Organize” followed by selecting “Folder” to get options (Windows 8,10,8.1) to carry out the steps.
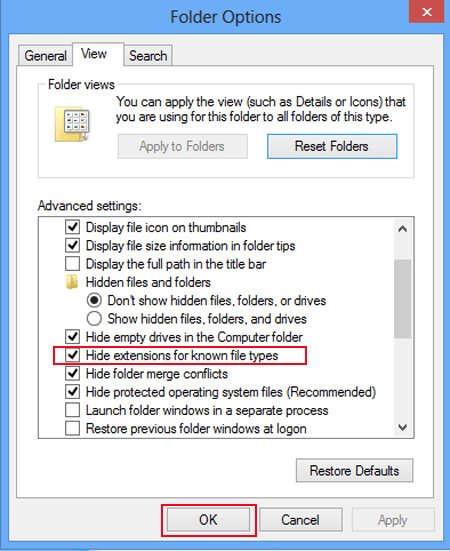
- After that, hit “View” and select “File Name Extension”.
- Now, click the option that states “Hide Extension File Type”.
- Once you select the appropriate option, tap on “Apply” and hit “OK”.
- Now locate the .tlg file, then copy and paste to the particular folder you had recently created namely “QBTest”.

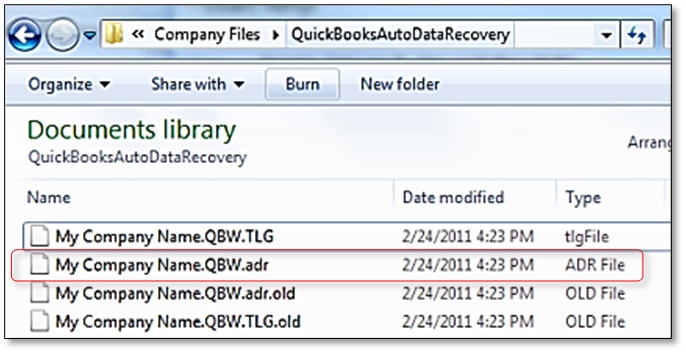
- Then, you will have to access the folder of “QuickBooks Auto Data Recovery” which is in the same company file location.
- Thereafter, copy the file “.QBW.adr” and press CTRL + V into the QBTest folder. Once done, you will be able to easily locate QBW.adr as well as .tlg. Files.
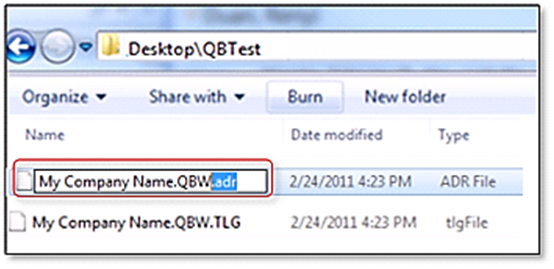
- Moving on, access the folder of QB Test and tap-right on the file- QBW.adr. Choose “Rename”.
- Remove .adr written at the end of your file name.
- Now access the company file from the folder of QBTest.
- Then use the Account register to confirm the transactions in the file.
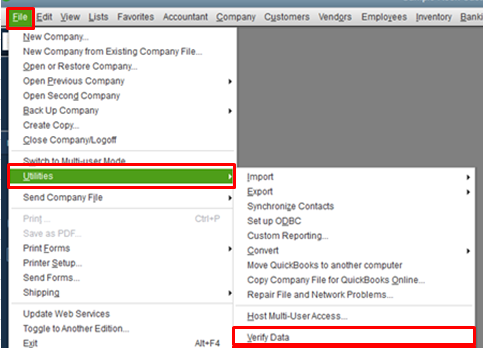
- Further, follow the path- File >> Utilities >> Verify Data.
- Now shift all the damaged files to a separate location. You can also replace them in the original location.
Method 2: Retrieving the Current Transactions via .TLG.adr and .QBW.adr Files
This method involves using the ADR version, TLG, and QBW files. But here you have to understand one point, that the process of Quickbooks auto data recovery files sometimes takes 11-13 hours to bring back the missing/damaged data:
- Firstly, make a fresh folder and provide it a name- “QBTest”.
- Using the feature of “QuickBooks Company File”, open QB Auto Data Recovery. It is recommended to view the location of the file by pressing Ctril+1 and F2 to open the “Product information screen” and no company open screen.
- Now, access the. Adr and TLG.adr files. Here, note that these file extensions contain similar names to your QB company file. If you could not spot the .tlg file, then obey the following instructions:
- Press “Windows+E”. It will open “File Explorer”.
- Choose “Organize” followed by selecting “Folder” to get options (Windows 8,10,8.1) to carry out the steps.
- After that, hit “View” and select “File Name Extension”.
- Now, click the option that states “Hide Extension File Type”.
- Once you select the appropriate option, tap on “Apply” and hit “OK”.
- Now locate the .tlg file, then copy and paste to the particular folder you had recently created namely “QBTest”.
- Delete the .adr files.
- Access QuickBooks.
- Further, access the company files in the QB test folder. Once you come there, use the Account register to confirm the transactions in the file.
- Further, follow the path- File >> Utilities >> Verify Data.
- Now shift all the damaged files to a separate location. You can also replace them in the original location.
Final Words
Now, you don’t need to worry about your damaged or missing data. Just use this amazing feature of Intuit named QB Auto Data Recovery Tool and get your data back. But that does not mean that you will ignore important things such as creating a data backup from time to time, properly shutting down the PC, and many more. Why bring uninvited issues?
We hope that you understood all aspects related to how to restore Quickbooks auto data recovery. We welcome your thoughts and suggestions below for more improvement.